
Car Reference Photography: Angles, Details, and Lighting
- VRI
- Apr 14
- 7 min read
There’s a difference between photographing a car and photographing it for reference. Editorial and lifestyle automotive photography is about mood, drama, and impact. Car reference photography is about something else entirely accuracy, completeness, and making sure that whoever uses your images can extract the information they actually need.
That distinction matters whether you’re shooting your first car at a local show or you’re an experienced photographer looking to build a reference library worth contributing to. The techniques aren’t complicated, but they’re specific and once you understand what makes a reference image useful, you’ll approach every shoot differently.
Getting the Angles Right in Car Reference Photography
Angle is the first thing to think about, because it determines what information your image actually contains. The most common mistake in reference photography is shooting everything from standing height at a comfortable distance. It feels natural, but it produces images that flatten the car’s proportions and miss the views that designers, restorers, and 3D artists need most.
The foundation of any reference set is the four orthographic views front, rear, and both sides, shot straight on at the vehicle’s midpoint height. These are the views that establish accurate proportions. They’re not the most exciting shots you’ll take, but they’re the ones that get used most consistently for modelling, restoration research, and design reference.
Once you have those covered, work through the following:
Three-quarter front and rear: Shot from roughly 45 degrees off the corner of the vehicle. These views show how the front and side surfaces relate to each other and give the strongest overall sense of the car’s character. Shoot from slightly below the roofline for the most useful perspective.
Low angles: Get down to sill height or below for side and three-quarter views. Low angles reveal the rocker panels, sill profiles, lower body shaping, and wheel arch geometry that straight-on shots at standing height completely miss.
Slightly elevated: A shot from just above the roofline standing on a step or shooting with the camera held overhead reveals the roof surface, the shoulder line, and how the greenhouse sits on the body. Useful for SUVs and cars with distinctive roof profiles.
Straight down on details: For wheels, bonnet vents, and roof features, shooting directly overhead produces a clean, undistorted view that’s particularly useful for 3D modelling reference.

Lighting for Car Reference Photography: What Works and What Doesn’t
Lighting is where more reference photography goes wrong than anywhere else. The goal is not beautiful light it’s revealing light. You want to see the car’s surfaces clearly, without shadows obscuring panel lines or highlights burning out detail.
Overcast daylight: the default choice
Overcast conditions are the most reliable for car reference photography. Cloud cover acts as a giant softbox, wrapping light evenly around the vehicle and making surface curvature easy to read without harsh shadows. If you have a choice of when to shoot, an overcast day will consistently produce more useful reference images than a sunny one.
Sunshine: manageable with care
Direct sunlight isn’t ideal, but it’s what you’ll often be working with at outdoor events. Early morning and late afternoon light is lower and softer than midday sun, with less contrast and more workable shadow direction. Midday sun creates deep shadows in wheel arches, under bumpers, and across any recessed surface feature hiding exactly the details a reference image should reveal.
In direct sun, pay attention to which side of the car you’re shooting. The shaded side will be significantly darker and lower in contrast than the lit side. If you need both, shoot the lit side first, then return when the light has moved or use a reflector to lift the shadow side.
Interiors and engine bays
Natural light rarely reaches evenly into a car’s interior or engine bay. A portable LED panel is the most practical solution compact enough to carry to events, bright enough to lift the shadow areas without creating harsh new ones. Failing that, a large white reflector can bounce available light into dark areas. Avoid using your camera’s built-in flash, which creates flat, blown-out images with no surface depth.

Detail Shots: The Most Valuable Part of Any Car Reference Photography Set
Full vehicle shots establish the overall form. Detail shots are where a reference set becomes genuinely useful for the people who rely on it most. A restorer verifying a badge position, a designer studying how a particular vent is integrated into a body panel, a 3D artist trying to model a headlight cluster accurately all of them need close-up detail photography that wide shots simply can’t provide.
The approach for detail shots is straightforward: get closer than feels necessary, fill the frame with the subject, and make sure the specific feature you’re documenting is in sharp focus. Work through the vehicle systematically rather than shooting details opportunistically — it’s easy to return home with twenty shots of the front grille and nothing of the rear lights.
Details worth capturing on every vehicle:
Badges and badging positions: Front, rear, and side badges, including their exact placement relative to surrounding body features. These are frequently needed for restoration accuracy and are often hard to find good references for.
Lights: Headlights, tail lights, and indicators both the full unit and close-ups of the lens detail, internal structure, and how the unit sits in the bodywork.
Wheels and tyres: Straight-on shot of the full wheel, plus close-ups of the centre cap and any distinctive spoke detail. Include the tyre sidewall if the specification is relevant.
Vents, grilles, and openings: The mesh or slat pattern, the surround, and how the feature integrates with the surrounding panel. These details define a car’s design character and are frequently referenced by designers.
Shut lines and panel gaps: The gaps between doors, bonnet, and boot lid reveal build quality and are important for restoration work. Shoot these in raking light that makes the gap depth visible.
Interior details: Dashboard, instruments, steering wheel, gear lever, door cards, and seat upholstery. Work through the interior as systematically as the exterior.
Engine bay: Full bay overview plus individual components where access and light allow. Original engine bays on classic cars are among the most requested and least well-documented reference subjects.

Equipment: What You Actually Need
Car reference photography doesn’t require specialist equipment. What it requires is good technique applied consistently. That said, some kit choices make a genuine difference.
Camera: A modern mirrorless or DSLR gives you the most control over exposure, depth of field, and focus point all of which matter for detail shots. A recent smartphone in good light is capable of producing reference-quality exterior images, but shows its limitations in lower light and for very fine detail.
Lenses: A standard zoom (24–70mm equivalent) handles full vehicle shots and environmental context. A short telephoto or macro lens is essential for detail work it lets you fill the frame with small subjects without getting so close you cast a shadow over them.
Stabilisation: A monopod is more practical than a tripod at busy events it gives you the stability benefit for detail shots without taking up as much space or requiring setup time.
Portable lighting: A small LED panel for interiors and engine bays. Compact, battery-powered options are widely available and genuinely transform the quality of interior reference shots.
Storage: Shoot in the highest resolution your camera allows and bring enough storage to avoid compromising on image quality. Reference images are long-term assets the storage cost of shooting full resolution is negligible compared to the value of having the detail when you need it.
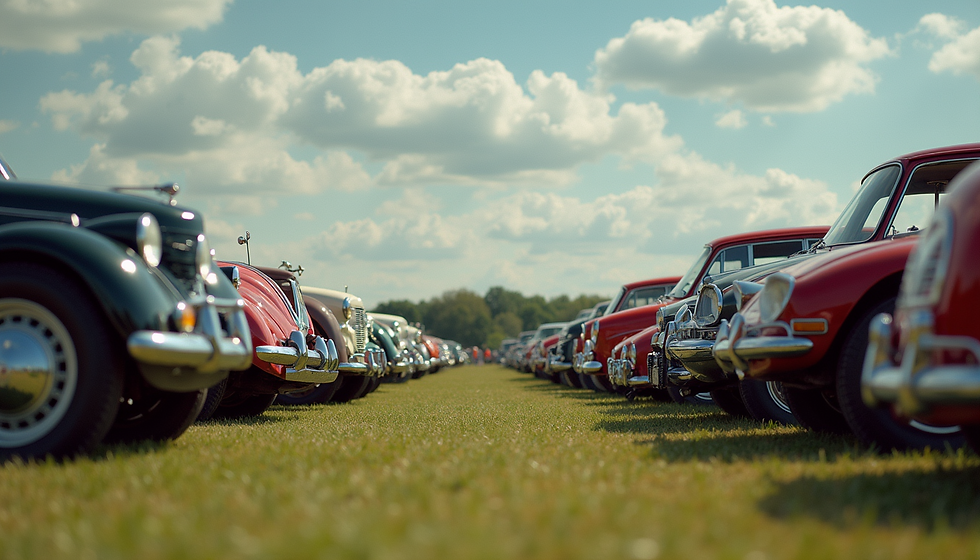
Making the Most of Car Shows and Events
Most car reference photography happens at shows, concours events, and static displays which means working around other people, time constraints, and conditions you can’t fully control. A few habits that make a consistent difference:
Arrive early. The first hour of most events offers the best combination of good light, empty backgrounds, and vehicles in their correct positions before crowds build up.
Prioritise the rarest vehicles first. Common models can be referenced again at another event. Rare or unusual vehicles may not appear again document those thoroughly before moving on to anything else.
Ask permission for access. For interiors, engine bays, or restricted areas, a polite request to the owner or steward often gets you access that other visitors don’t get. Introduce yourself, explain what you’re doing, and respect whatever answer you receive.
Work the background. Move around the vehicle to find angles where the background is cleanest before settling on your shooting position. A slightly unconventional angle with a clean background produces more useful reference than a textbook angle with a cluttered one.
Review as you go. Check images on the back of the camera while you’re still next to the vehicle. A missed angle or a soft focus detail is easy to reshoot on the spot and impossible to fix at home.
Put It Into Practice — and Share What You Capture
The principles covered here apply whether you’re photographing a common classic at a local show or a rare race car at a major concours. Consistent angles, considered lighting, and systematic detail coverage are what separate a useful reference set from a collection of good-looking photographs.
If you’re applying these techniques at events this year and coming back with strong reference material, we’d love to hear from you. Our vehicle reference image library is built on exactly this kind of photography high-resolution, multi-angle, and detailed enough to be genuinely useful. Browse the library to see what’s already available, and get in touch if you’d like to contribute your own.
Comments